Now on to the turkey…
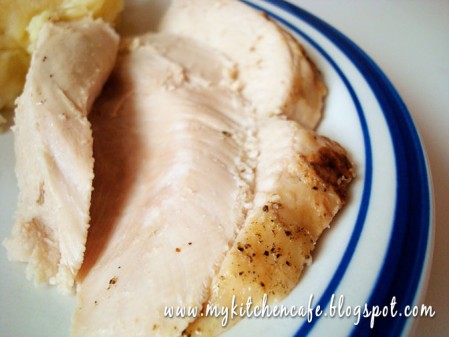
I used to be scared of cooking turkeys. They frightened me. They are big. They have the potential to transmit food-borne illnesses if cooked improperly. They are heavy. They are unattractive in their naked, uncooked form. I was intimidated.
That is, until my Aunt Marilyn pulled through with her incredible 2-hour turkey recipe/method. For the record, I’ve made this twice now (my Aunt has made it numerous times). The first time I happened to set my oven on fire, but let’s not dwell on that, because the second time, this turkey was undeniably the juiciest, most tender, flavorful turkey I’ve ever had. No brining, no overnight bakes and soaks, just old-fashioned seasonings and a unique cooking method. The name is a tad misleading because with oven preheating time included, it takes a bit longer than two hours, but the result is well worth it. It is the main attraction, after all, so it does deserve some extra TLC.
I’m no longer afraid of the Thanksgiving bird and I will never need another turkey recipe. This one’s a keeper. Oh, and the drippings make unbelievably delicious gravy.
Make Ahead Tip:
The only tip I’ll mention is to be sure and plan ahead for defrosting your turkey! The safest way to defrost a turkey is in the refrigerator. If your turkey is frozen, the best method to plan on is to place the turkey in the refrigerator and allow approximately 24 hours of defrosting for every 5 pounds of turkey. That means, plan ahead! If your turkey weighs 20 pounds, you’ll need four days of defrosting time.
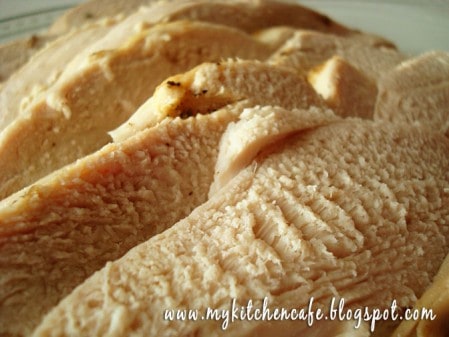
Aunt Marilyn’s Incredible 2-Hour Turkey
Printable Version
1 18-22 pound turkey (I’ve used a 14-pound turkey with great results, also)
carrots, celery (cut into large chunks), onion (peeled and cut into large chunks), garlic cloves (peeled and smashed)
juice of 1 lemon
1 tablespoon salt
1 tablespoon pepper
1 tablespoon poultry seasoning
butter
brown paper bag
Preheat the oven to 500 degrees and let it heat for one hour. Meanwhile, remove giblets and neck and wash the turkey. Fill the cavity of the turkey with carrots, celery, garlic and onion. Combine the lemon juice, salt, pepper and poultry seasoning in a small bowl. With your hands, rub the entire turkey with the lemon juice mixture.
Place the turkey breast down (this is opposite of how a turkey is normally cooked – so just flip the turkey upside down) in a large roasting pan. Place the roasting pan in the hot oven for as many minutes as the turkey weighs (ie. 19 lb. turkey = 19 minutes). Bake for the allotted time.
Meanwhile, grease a large brown paper bag with butter on both sides. Remove the roasting pan from the oven and carefully (because the turkey and roasting pan are HOT) make a tent out of th paper bag and drape it over the turkey, taking care to tuck the sides of the bag into the roasting pan (otherwise, the butter will drip off the bag, leap onto the oven burner and possibly create a large fire…I may or may not know this from experience). See pictures below for a visual image. Turn the oven down to 400 degrees and cook the turkey for two hours.
Remove the roasting pan and turkey from the oven and let turkey sit for 20 minutes. Remove turkey from the roasting pan and pour the drippings into a medium-sized saucepan. Bring to a boil. Make a slurry from flour and water (to the consistency of thick, heavy cream) and add to the drippings until desired consistency is reached.
Recipe Source: adapted slightly from Aunt Marilyn
*There is information, like this link, that recommends not using grocery store paper bags for cooking. If you are concerned about that, you can try a large oven bag, but I’ve never tried it and can’t attest to how it would work.
Here is a sideview of the roasting pan with the paper bag tucked INTO the sides. The paper bag should be greased with butter on both sides and tucked in like picture below. With my large roasting pan, I still had to trim about four or five inches off the side of the paper bag so it wasn’t too long to tuck in.
Celery Herb Stuffing
Let’s start with the stuffing shall we?
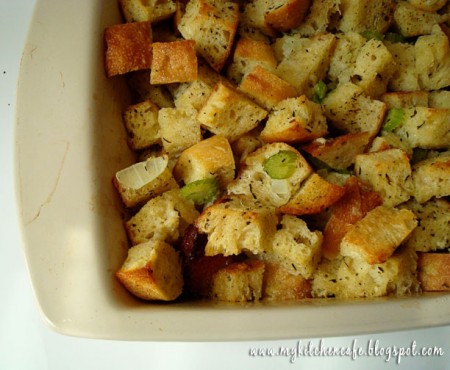
I know that prepackaged, boxed stuffing makes a major appearance during Thanksgiving. Part of me completely understands – I mean Thanksgiving is the craziest of all cooking days with the oven doing quadruple duty and a little shortcut here and there never hurts. But the other part of me is hoping I can change the trend and bring homemade stuffing back to the Thanksgiving table.
I tried homemade stuffing for the first time four years ago. And I can never go back. There is absolutely no comparison between homemade stuffing and the other “stuff”ing.
The flavor is fresh, unprocessed and completely delicious. In my house we prefer stuffing to be a bit on the chewy, crunchy side of things. No soggy bread for me, thank you very much. The dreamy thing about this recipe is you can have it however you like – soft and dare I say, mushy…or firm and tender.
Either way, this is the best stuffing I’ve ever had.
Make Ahead Tip:
When I make this stuffing, I always toast the bread in the oven the night before. I also chop up all the vegetables and cook them the night before, refrigerating after they are cooled. Finally, I combine the seasonings in one small bowl. The day of, I can throw everything together and bake it quickly.
Click HERE for all of the Thanksgiving 101 Recipes.
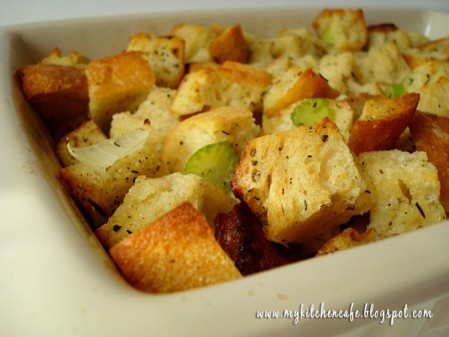
Celery Herb Stuffing
Printable Version
*Makes a 9X13-inch dish*
7 tablespoons butter, plus more for dish and baking
1 loaf rustic/artisan/crusty white bread, cut into 1/2-inch cubes (about 9 1/2 cups bread cubes)
Salt and Pepper to taste
2 tablespoons extra-virgin olive oil
5 celery stalks, thinly sliced on the diagonal
2 medium onions, halved lengthwise and thinly sliced in half-moons
2 cloves garlic, finely chopped
1/2 to 2 cups chicken broth
1/2 teaspoon poultry seasoning
3 tablespoons coarsely chopped fresh flat-leaf parsley
1 teaspoon dried sage
1 teaspoon dried thyme
1 teaspoon dried rosemary (rubbed between fingers to crumble lightly)
3 to 4 large eggs, lightly beaten
Preheat the oven to 350°. Melt 5 tablespoons butter in the microwave. Toss with bread cubes in a large bowl. Spread in a single layer on 1 or 2 rimmed baking sheets. Toast in the oven, tossing once, until golden, about 20 minutes. Let cool completely.
Heat the oil and remaining 2 tablespoons butter in a large skillet over medium-high heat until butter has melted. Add celery, onions, garlic, and a pinch of salt; cook, stirring occasionally, until golden brown and soft, about 10 minutes.
To bake all of the stuffing in the oven: (this is my preferred method) Put vegetable mixture and toasted bread into large bowl. Stir in poultry seasoning, herbs, and 2 cups broth into stuffing. Stir in 4 eggs until bread mixture is well coated. Spoon into a buttered 13-by-9-inch baking dish, and dot generously with butter. Cover with foil, and bake in a 375° oven for 25 minutes. Uncover, and bake until golden brown, 10 to 15 minutes more.
To stuff inside of turkey: Put vegetable mixture and toasted bread into a bowl. Stir in 1 cup broth, the poultry seasoning, and herbs; season with salt and pepper. Stir in 3 eggs. Stuff inside of turkey and bake.
Recipe Source: adapted from Martha Stewart
Blue Ribbon Pie
We can’t forget the pie!

I’ve said it before and I’ll say it again: I’m no good at making pies. But thanks to my Aunt Marilyn’s latest discovery (a no-fail pie crust!) and a winning recipe for apple pie, I think I’m well on my way to conquering my pie fears.
Apple pie screams Thanksgiving dinner to me, hence the reason for sharing a recipe for apple pie with you during Thanksgiving week here. Thanks to this apple pie recipe, I now have two favorite apple pies. You can read about the other one (a delicious caramel apple pie from my brother and his wife) here.
This classic apple pie requires a bit more time as the recipe asks you to saute the apples and cook them down so that your pie doesn’t come out of the oven with a gappy and soggy crust. It is well worth the effort, in my opinion. The apples were both sweet and tart and the pie turned out packed with apples from floor to ceiling. Perfect, perfect, perfect.
Make-Ahead Tip:
The pie dough can be made ahead of time. Also, the pie, once baked and cooled, can be covered with plastic wrap and stored at room temperature for up to one day. To serve warm, reheat the pie in a 300-degree oven for about 15 minutes.
Click HERE for all of the Thanksgiving 101 Recipes.
**Check back tomorrow for the phenomenal Bonus Recipe**
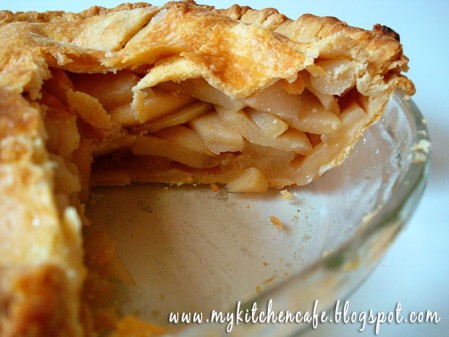
Blue-Ribbon Apple Pie
Printable Version
1 recipe double-crust pie dough (easy, no-fail recipe below)
2 1/2 pounds (about 5) firm tart apples, peeled, cored, and sliced 1/4-inch thick (I used Granny Smith)
2 1/2 pounds (about 5) firm, sweet apples, peeled, cored and sliced 1/4-inch thick (I used Gala)
1/2 cup plus 1 tablespoon granulated sugar
1/4 cup packed light brown sugar
1/2 teaspoon grated fresh lemon zest
1/4 teaspoon salt
1/8 teaspoon ground cinnamon
2 teaspoons fresh lemon juice
1 egg white, beaten lightly
Roll one disk of pie dough into a 12-inch circle and fit into a 9-inch pie plate, letting the excess dough hang over the edge. Cover loosely with plastic wrap and refrigerate for 30 minutes. Roll the other disk of dough into a 12-inch circle on a lightly floured surface and transfer to a parchment-lined baking sheet; cover with plastic wrap and refrigerate for 30 minutes also.
Toss the apples, 1/2 cup of the sugar, brown sugar, zest, salt, and cinnamon together in a large bowl. Following the photos, transfer the apples to a large pot or Dutch oven and cover, cooking over medium heat and stirring frequently, until the apples are tender when poked with a fork but are not mushy (don’t over cook because the apples will finish cooking and softening up in the oven!), about 10-12 minutes.
Transfer the apples and their juice to a rimmed baking sheet and let cool to room temperature, about 30 minutes.
Preheat the oven to 425 degrees. Drain the cooled apples thoroughly in a colander, reserving 1/4 cup of the juice. Stir the lemon juice into the reserved 1/4 cup of apple juice.
Spread the apples into the dough-lined pie plate, mounding them slightly in the middle, and drizzle with the lemon juice mixture. Loosely roll the second piece of dough around the rolling pin and gently unroll it over the pie. I find it easiest to trip the bottom crust and keep a 1/2-inch overhang. Fold this overhang up over the top crust and crimp the edges together. Cut 4 vent gashes in the top of the pie. Brush the crust with the egg white and sprinkle with the remaining one tablespoon sugar.
Place the pie on a foil-lined baking sheet and bake until the crust is golden, about 25 minutes. Reduce the oven temperature to 375 degrees and continue to bake until the juices are bubbling and the crust is deep golden brown, about 25-30 minutes longer. Let the pie cool on a wire rack until the filling has set, about 2 hours. Serve slightly warm or at room temperature.
Recipe Source: adapted from America’s Test Kitchen Family Baking Handbook
Easy No-Fail Pie Crust
2 cups flour
1 teaspoon salt
2 teaspoons sugar
1 cup Crisco shortening (butter-flavored or regular, I prefer regular)
Mix the above ingredients with your hands to form a uniform mixture.
Add 1/3 cup ice water.
Dip your hands in flour so they won’t get too sticky (although it will still be messy). Mix the ice water in to the shortening/flour mixture with your hands. Roll into a round ball (the dough will resemble a sugar cookie dough). Divide in half and on a lightly floured surface roll into two circles. Bake according to pie directions.
Recipe Source: Aunt Marilyn
Light Wheat Rolls
from Liz Knudsen
2 pkgs. active dry yeast or 4 1/2 tsp. active dry yeast
1 1/2 c. warm water
1/4 c. honey
1/4 c. olive oil
1 egg
1 1/2 tsp. salt
2 3/4 c. whole wheat flour
2 3/4 c. white flour
In a large bowl, dissolve yeast in warm water. Let stand until creamy, about 10 min. Combine honey, salt, olive oil and egg into yeast mixture. Add the whole wheat flour. Mix well. Stir in white flour 1/2 c. at a time, until dough pulls away from the sides of the bowl. (Sometimes I have to add as much as another 1/2 c. flour.) Continue to knead in mixer for another 4-5 min. Lightly oil a large bowl, place dough in bowl and turn to coat with oil. Cover with a cloth, and let rise in a warm place until doubled in volume, about 1 hour. Punch down dough, cover and let rise until it doubles again, about 30 minutes. Punch down dough, and divide into 24 golf ball size balls. Place dough onto a greased jelly roll pan or large cookie sheet. Let rise uncovered in a warm place for 40 minutes or until doubled. Preheat oven to 400 degrees. Bake for 15 minutes or until golden brown. Remove from pan and brush with melted butter.

No comments:
Post a Comment